This feature is currently in beta testing. Interested? Then contact us at support@absence.io.
With absence.io's multi approval process, you can define customized absence approval processes – from simple approvals to complex, multi-stage workflows.
This ensures that requests are reviewed by the right people. For example, you can define: first department Lead → HR → then management, and much more!
Where can set up the approval policies?
You first create the desired different approval logics in the global settings.
Go to: Settings → Absence Management → Approval policies. Here you can view existing rules or create new ones.
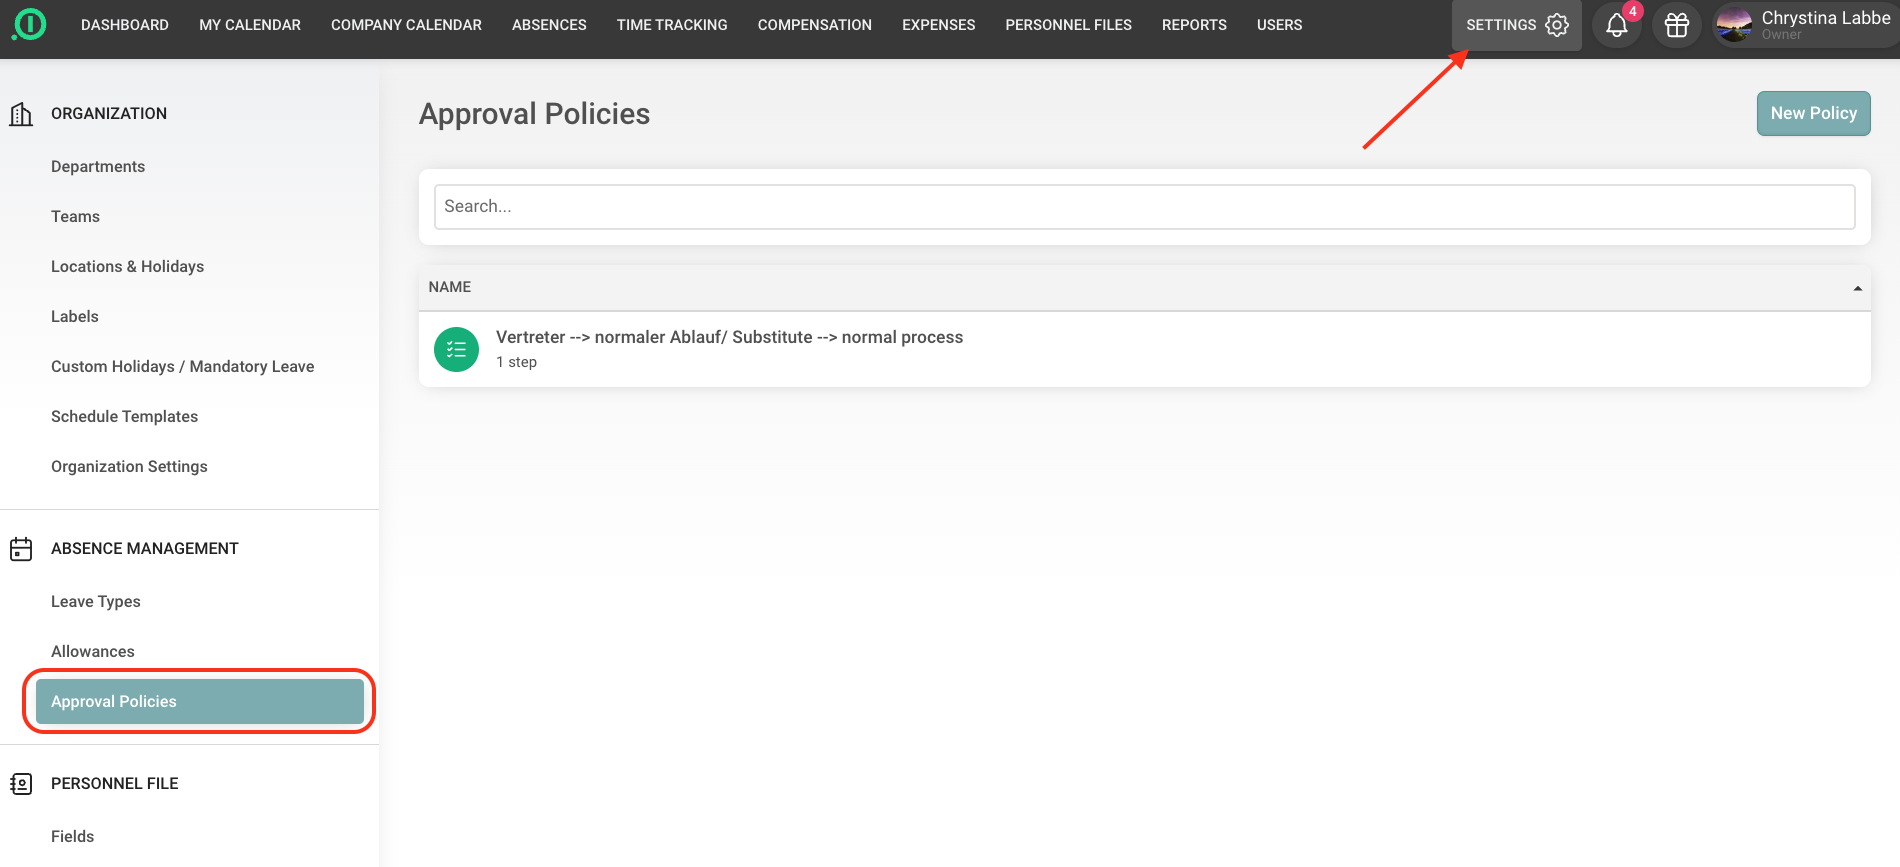
Create a new policy:
Click on “New Policy” in the top right corner.
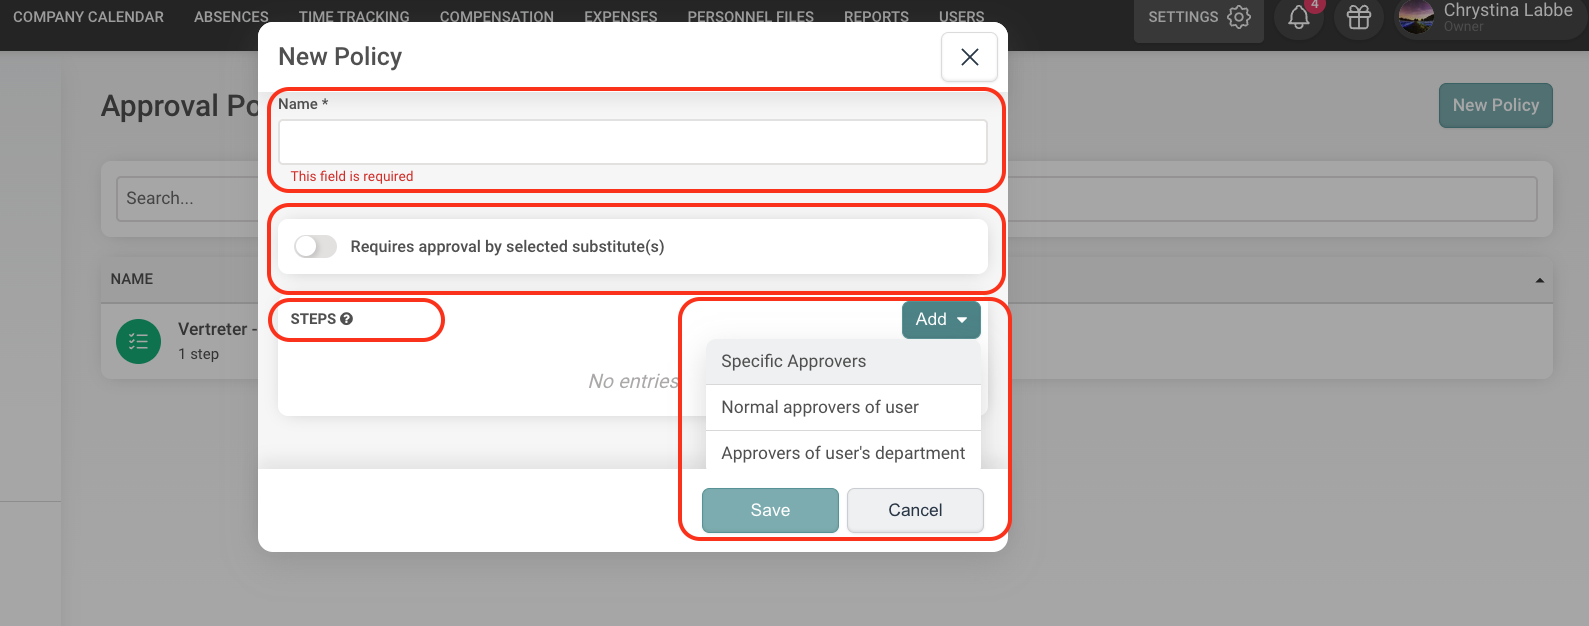
A new window will open, where you can:
assign a name to the rule
optionally define whether a substitute must approve first
define the individual steps of the approval logic
Create approval logic:
Once you click on “Add”, you can choose between the following options:
Specific users → select individual people as approvers (e.g. HR, CEO)
User approver (profile) → the approver stored in the user profile (can also be the department approver)
Department approver → the approver assigned to the department
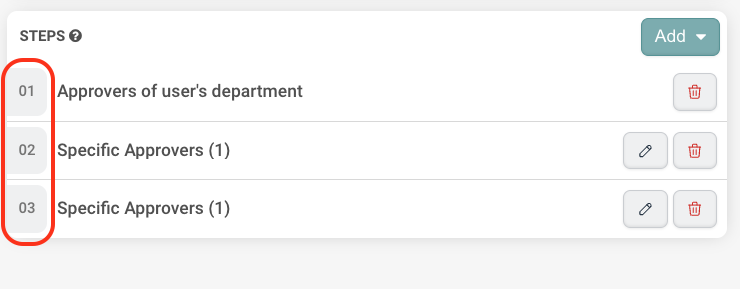
You can add multiple steps. Depending on the order in which you select the options, they will be automatically numbered. If you want to make changes, you can easily reorder the steps via drag & drop.
The request will then be forwarded step by step through the defined approvers, each with the option to leave a comment.
If multiple users should be included in one step, you can also define, for example, 2 or 3 approvers within that step. The previous approver can then choose one of them. If no one is selected, one of the defined users will be chosen automatically at random.
Example:
Department manager
HR (one person)
Management (two people)
NOTE: If you activate the toggle “Requires approval by the selected substitute(s)”, this step will take place before the defined steps below. However, it is not displayed as da separate step in this section.
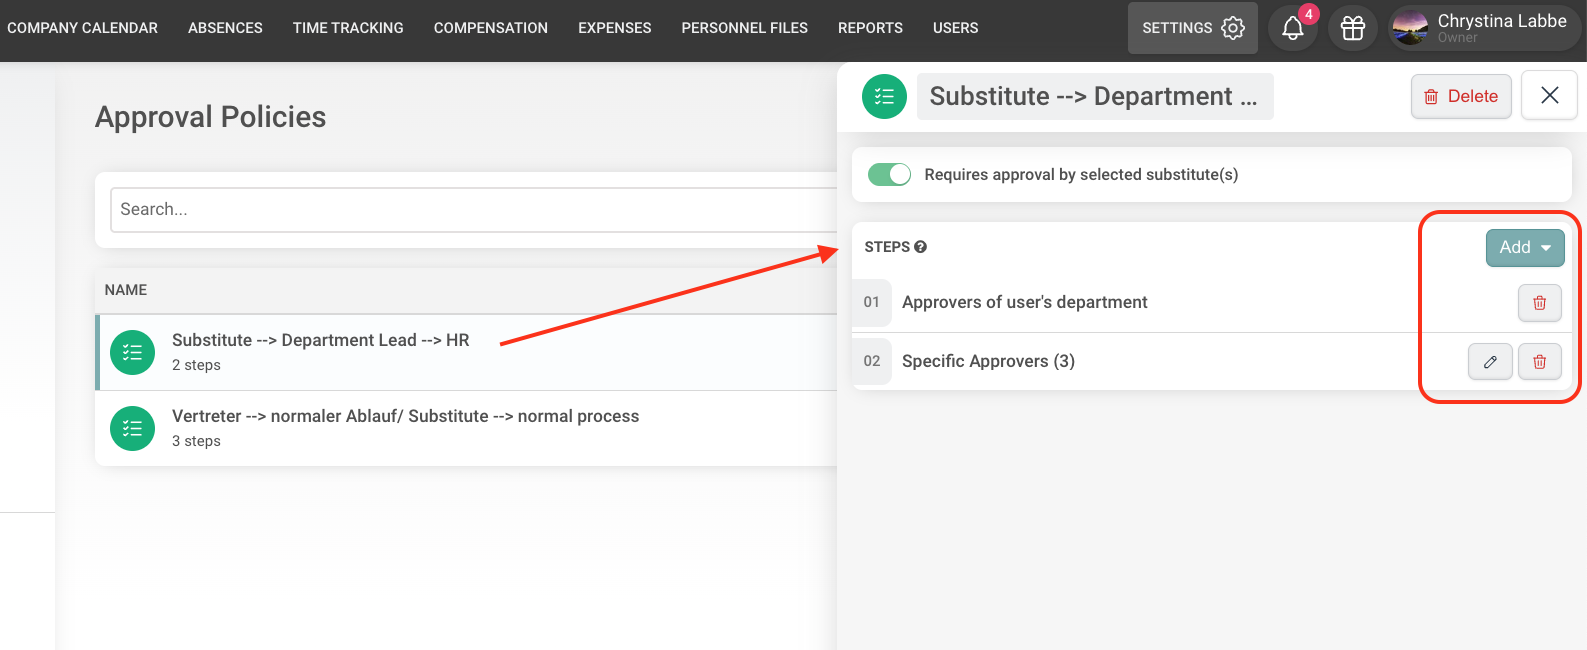
Overview of created policies:
After saving your policy, you will see an overview of all created policies. You can edit or delete them individually at any time.
Assign approval rule:
Now it gets interesting! Your created policies are not active yet at this point, as they are not assigned to any leave type. The advantage of this setup is that you can define different approval flows depending on the leave type – for example: Vacation: Department Manager → HR or Business Trips: Department Manager → Finance → Management
Go to: Settings → Absence Management → Leave Types. Select a leave type (e.g. Vacation). Activate the option “Requires approval”. Then choose your created policy under “Approval Policy”
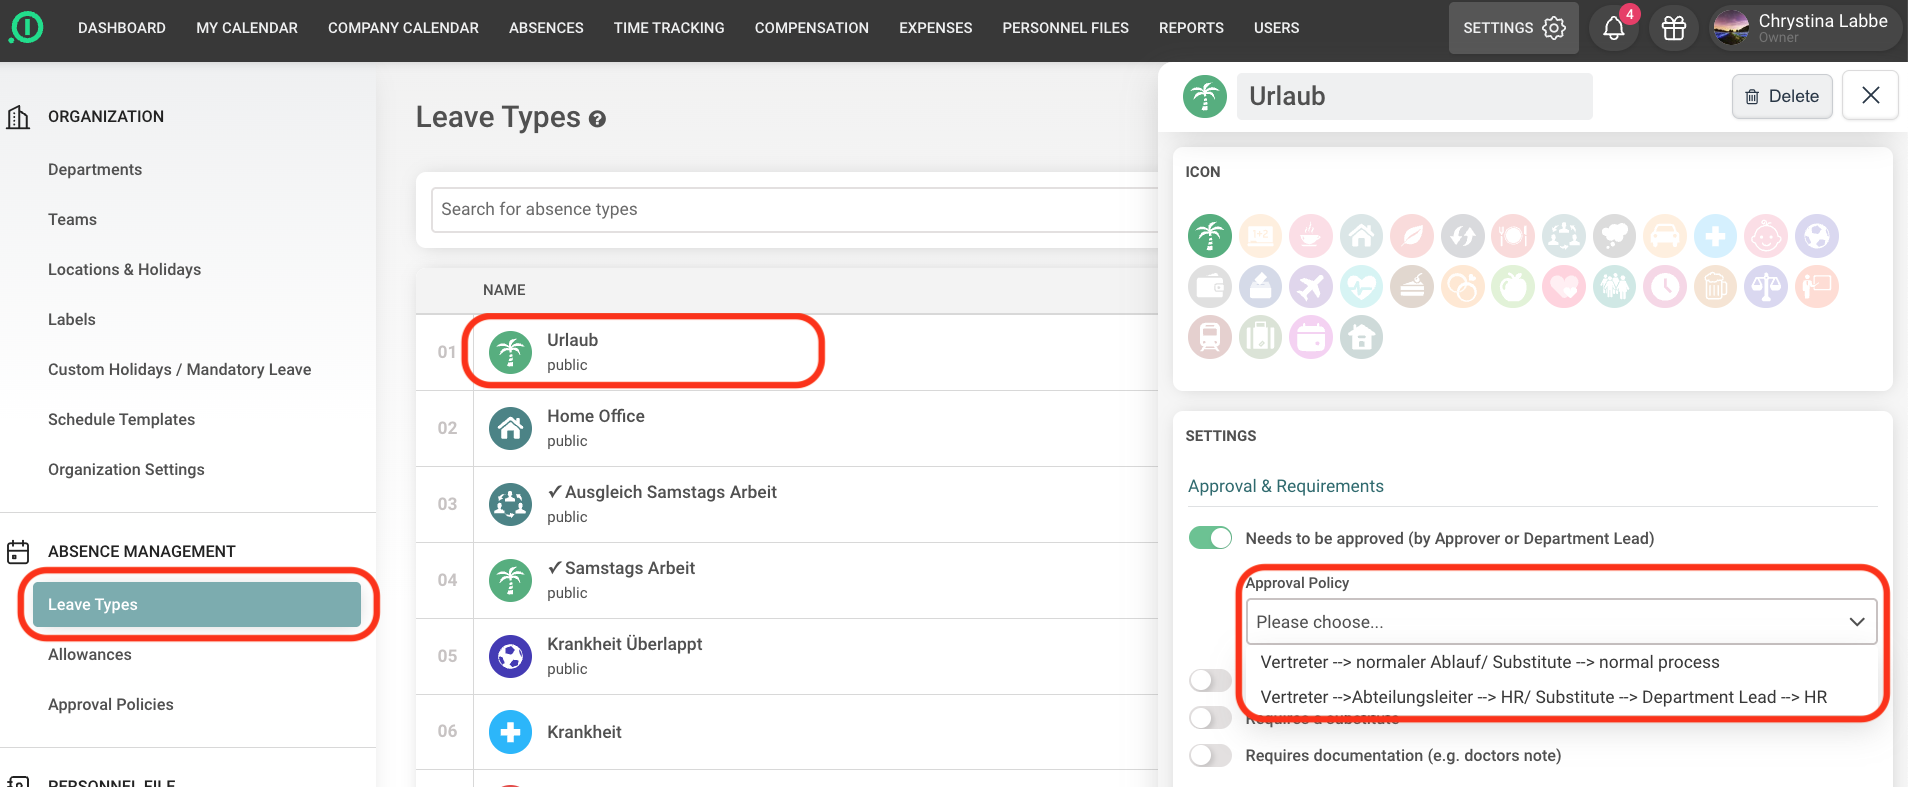
If you do not select anything in this drop-down menu, the system will default to the department approver or the direct approver defined in the employee’s profile.
Result:
Great! You have successfully created a multi-level approval process. Once the rule is assigned, leave requests for the respective leave types will automatically go through the defined approval steps. Each step must be completed before the next one begins.
If you would like to see how this process works in a real example, you can find more information here .
Have fun using our solution!
Your team at absence.io 💙