absence.io Expenses offers a variety of different ways of approval structures.
In this article we aim to describe the basics of what you are able to do and also step by step guides to common scenarios.
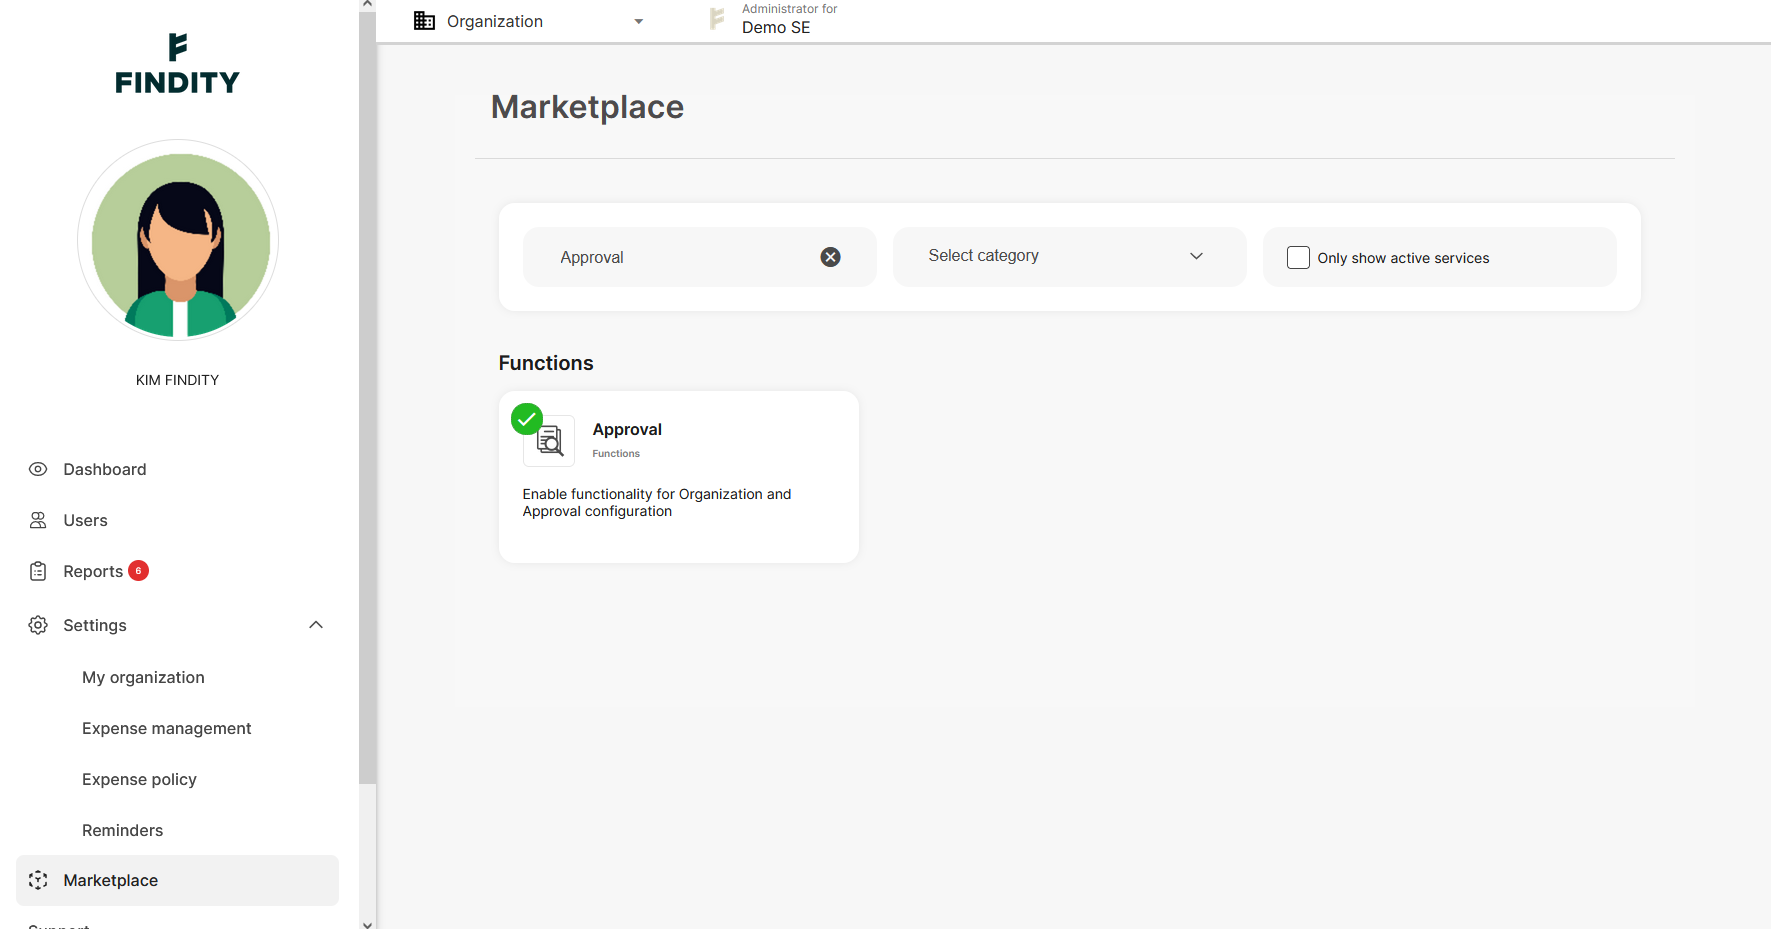
First of all Approval needs to be activated in Marketplace.
Let's start with having a look at the default page of Approval which contains three different boxes, Approval settings, Approval structure and Temporary approvers.
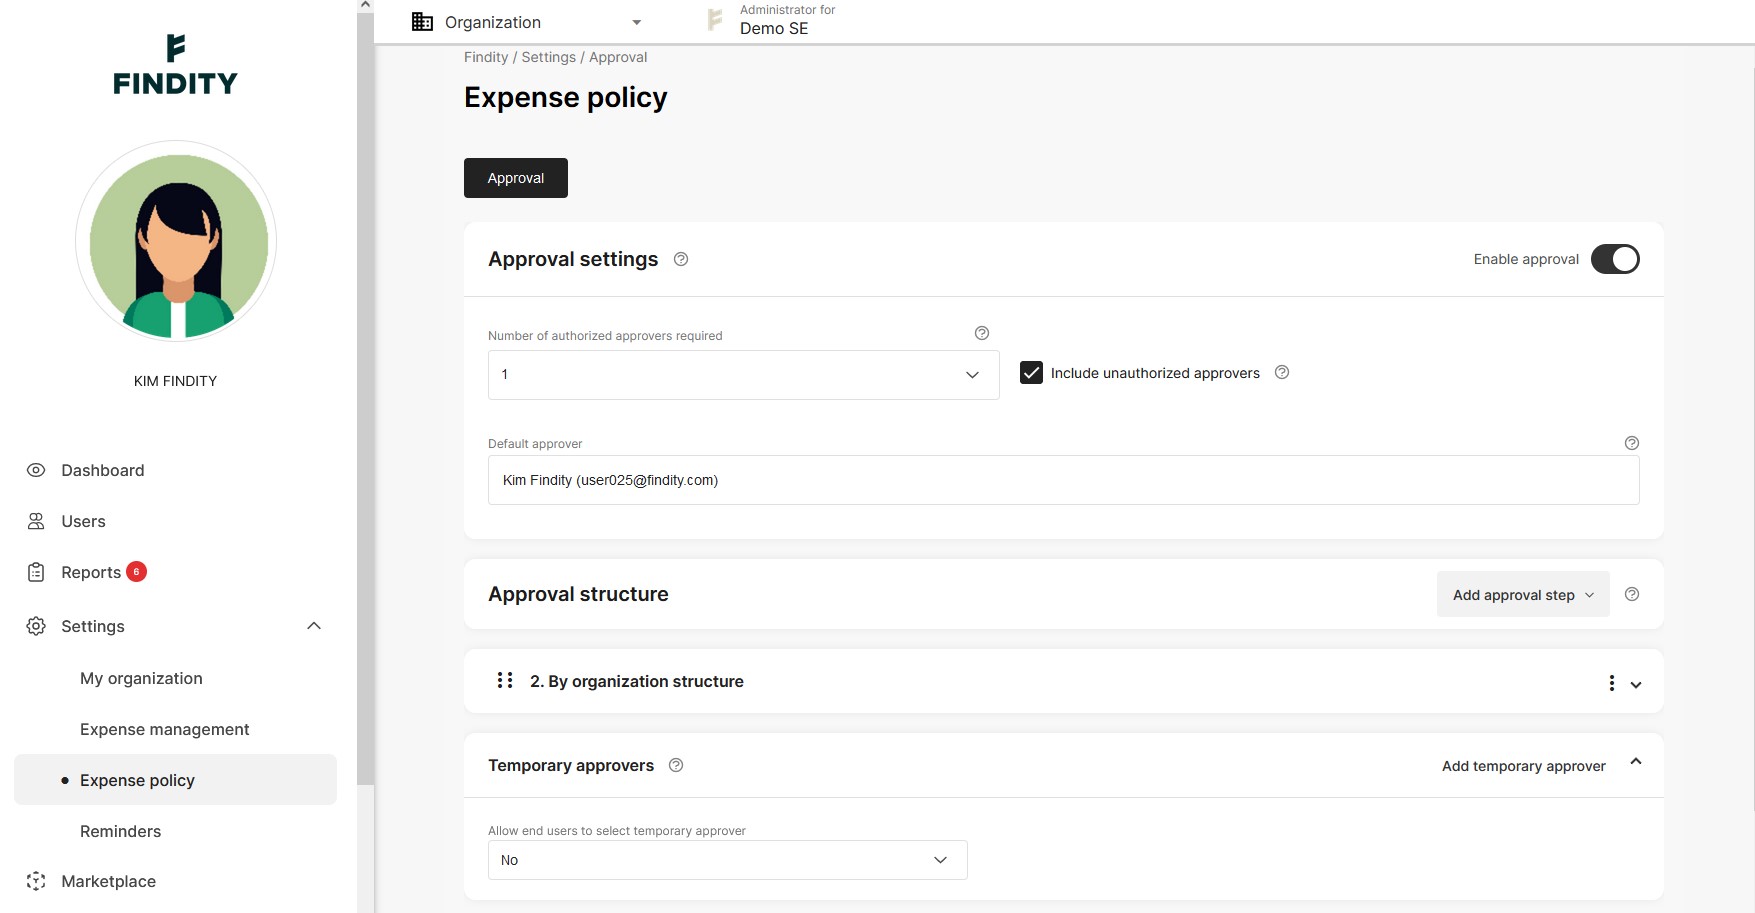
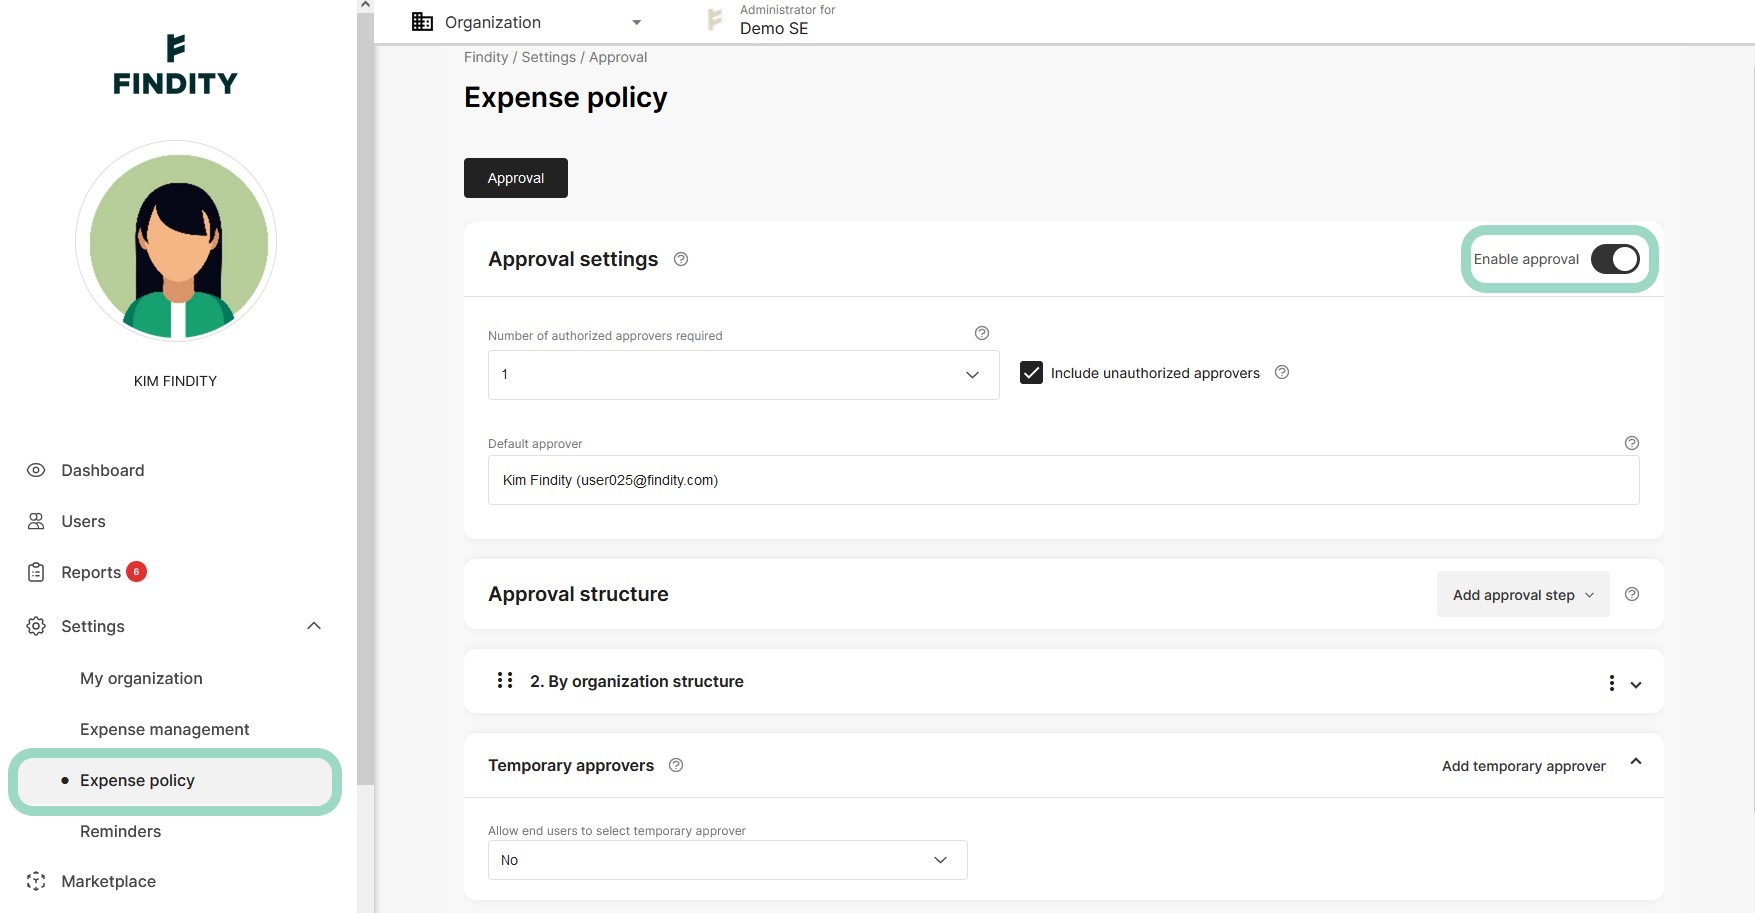
Approval settings
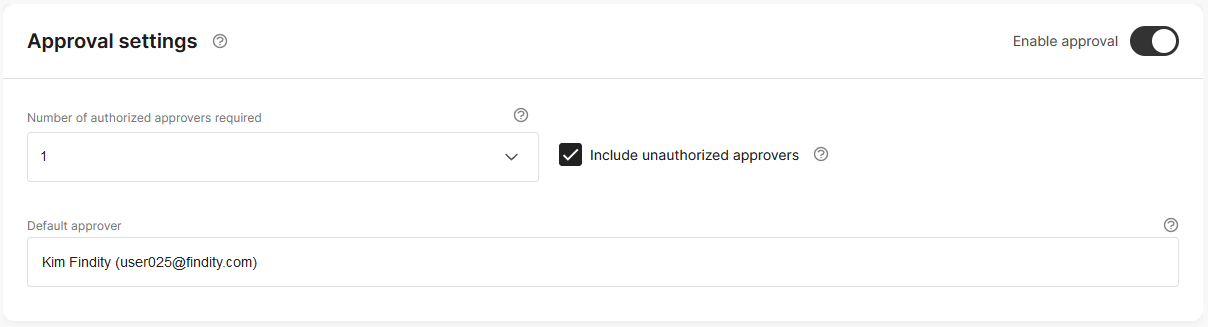
Number of authorized approvers required
In many cases only one approver is necessary but it is also common that more than one person will do the approval.
Let's say you work as a salesperson, your expenses will be approved by the sales manager. When the sales manager has approved, the CEO makes the last call and approves what the Sales manager has approved.
In this case the company has 2 approval steps and two persons need to approve. You can have up to 3 approval steps.
Include unauthorized approvers
If this option is enabled all approvers will get a notification even if the approver doesn't qualify.
For example if a report of 250 euro is sent in by a user. With Include unauthorized approvers enabled Approver 1, with a 200 euro approval limit, will still get the report for approval.
Once Approver 1 has approved the report will go to Approver 2 who doesn't have an amount limit and is therefore authorized.
If Include unauthorized approvers would have been disabled Approver 1 wouldn't get to approve and the report would go directly to Approver 2.
Default approver
The default approver has two purposes.
- If one person should approve all reports you only need to add the default approver. See step by step guide.
- If you have multiple approvers and absence.io Expenses for some reason doesn't know who should approve the report goes to the default approver. An example might be that a user, who is the approver of a department, has been removed as approver and no new approver for that department has been appointed. In that case absence.io Expenses can't find an approver and will send the report to the default approver.
Approval structure
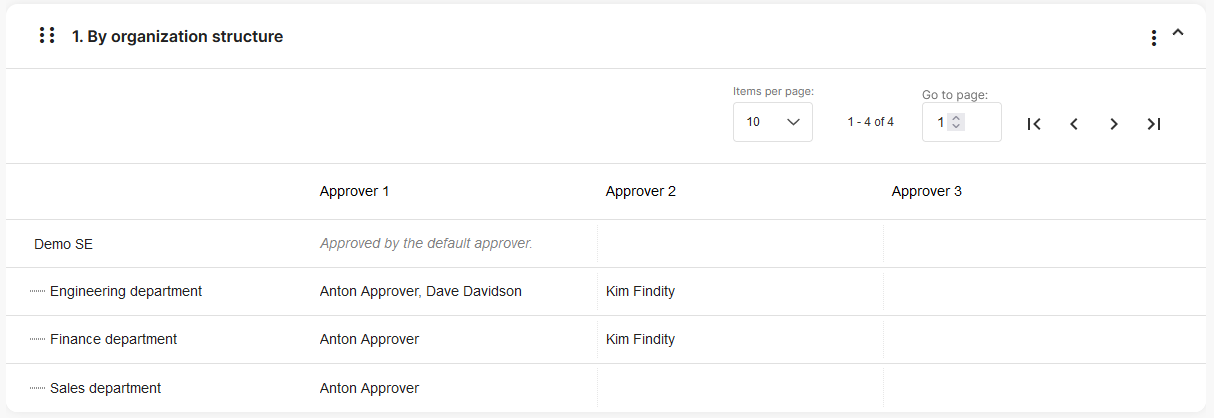
This usually refers to departments. i.e. the Finance department or the Sales department. Each user can be connected to one department. But it is also possible to use a dimension as grounds for the approval structure. Some companies use Cost centers, rather than departments, to be grounds for the approval structure. Then, based on what cost center the user chooses the expense will get approved by the correct approver. In this article you will learn where and how to define an organizational structure.
It is also possible to combine organisation structure and dimension. Let's say every user belongs to a department but the company has a lot of projects going on. Then set up a dimension named Projects and let the users choose from a list of ongoing projects. Every project has its own approver. If the user doesn't choose a project (leaves that field empty) the expense will be approved by the approver of the department.
Temporary approvers

If an approver is on vacation or off work for some reason a temporary approver can step in and take its place. When you set up the approval structure you can set the rules for how a temporary approver can be appointed. See related article.
No = An approver can't add a temporary approver
Only from approvers with same or higher approval limit = In this case an approver can choose from other approvers
Yes, from all employees = The approver can choose from any user in the organisation
Process one Approver:
If there is only going to be one user approving everyone's expense reports it's a fast and easy setup. Go to Organisation mode and then Settings -> Expense policy in the left menu. Enable Expense policy with the toggle to the right.
Under Approval Settings
- Let the Number of authorized approvers required remain as 1.
- Include unauthorized approvers should be disabled
- In Default approver write the name of the user who will be approver. A list of users appears, choose the lucky one.

Do you want the default approver to be able to add a temporary approver if the default approver is away?

Then choose "Yes, from all employees under Temporary approvers" or "Only from approvers with the same or a higher approval limit". Otherwise choose No. As an administrator you're always able to add a temporary approver by clicking Add temporary approver to the right.
Now you're done, don't forget to save!